The world of online education is booming more than ever before. With the need for flexibility, convenience, and access to top-tier learning materials from the comfort of one’s home, the e-learning market is projected to reach $325 billion by 2025. As a result, more entrepreneurs, subject matter experts, and instructors are drawn to the idea of transforming their wealth of knowledge into virtual classes and courses.
If you too want to dive into the world of online education and create your own e-learning platform, look no further. This blog will walk you through the process of setting up your online learning website using LifterLMS—a popular and powerful Learning Management System (LMS) plugin for WordPress.
Are you looking for the greatest LMS platform? Get Here to know more.
Why Choose LifterLMS as Your Online Course Website’s Content Management System?
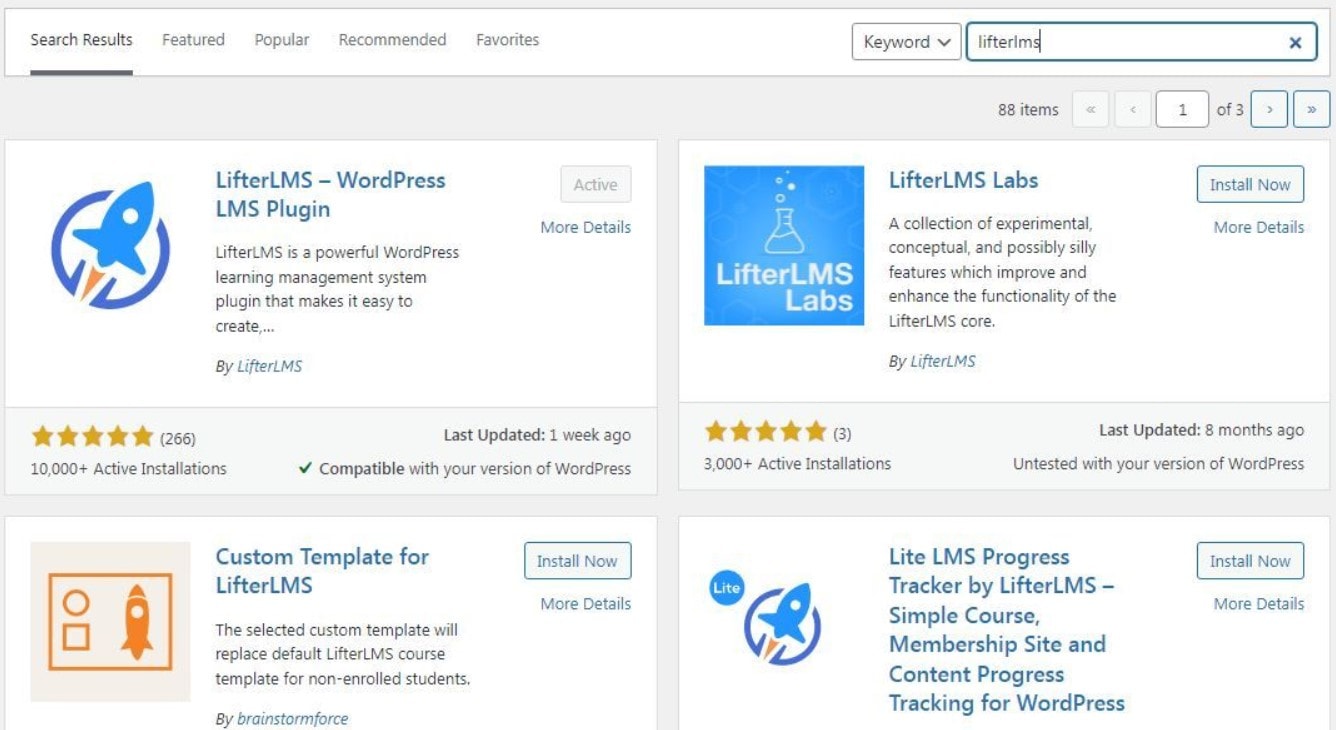
With over 10,000 active installs, LifterLMS is a WordPress Learning Management System (LMS) plugin. There is a free version of the plugin with numerous functionality, as well as several commercial integrations.
However, you may create a completely functional online course website without using any of these plugins. LifterLMS allows you to create courses, set prerequisites, and add quizzes, among other things.
Although these features aren’t technically unique to LifterLMS, they definitely make it stand out:
1. The Free Plan has a lot of features.
The LifterLMS core plugin is absolutely free to download from the WordPress plugin repository, unlike some comparable LMS plugins. In most circumstances, you won’t need to utilize a paid extension because the free plugin competes well with most premium LMS plugins.
If you’re starting from scratch with your online course website, combining LifterLMS with one of the top free WordPress themes is a great option.
PayPal integration, enhanced quizzes, and social learning are among the paid LifterLMS enhancements.
2. No other plugins are required
Another advantage of LifterLMS’s extensive functionality is that you don’t need to install any other plugins. The plugin is essentially a full-fledged solution. If you require further functionality, there are numerous paid LifterLMS connections available that will work effortlessly.
Many other LMSs, on the other hand, need you to install additional plugins in order to access certain functionalities. For example, to provide your users with a fully online learning experience, you may need to combine an LMS plugin with a membership plugin.
There’s nothing wrong with this technique in theory. WordPress plugins and themes should follow a set of guidelines to ensure compatibility. In practice, though, plugin conflicts do exist, and resolving them can be a pain.
3. Simple to Extend
LifterLMS is a capable LMS on its own, plus there is a large number of native LifterLMS integrations for expanding your website. That’s not all, though. The plugin works with over 1,500 other apps in the Zapier plugin directory, giving you even more possibilities.
5 Easy Steps To Create an Online Learning Website With LifterLMS
Step 2: Create a New Course
Right below the LifterLMS tab, click on Courses. Start by giving your new course a name. Creating sections and lessons that fit your curriculum is the next step.
Step 4: Add Some Content to Your Lessons
Your online course website is coming up nicely! Now all you have to do is add the most crucial part: the content of your course.
You can include course content in whatever type you like, including text, audio, photos, and video. Alternatively, you could do all of the above.
To see all of the lessons you just made, go back to your WordPress dashboard and hover over Courses, then click Lessons. To add content to a lesson, simply open it and enter your content like you would any other WordPress post or page.
If you’re going to use video, it’s advisable to put it somewhere else, like YouTube. The video clip can subsequently be made available as an embed.
Do you want the best LMS platform and get a 50% discount? To get discount coupons and save money, click here
Quick Links: