The software is eating the world in everything possible sense. As technology advances and we slowly progress into the world controlled by AI, jobs in the technology sector will see a spike. Writing software is a skill that can be self-taught and is fairly easy as well at least in today’s world’s with the internet literally overflowing with resources about the same. But as a software developer, writing code isn’t all that would be expected of you. You need to learn the subtle art of managing your company’s code base as they scale and introduce more features. People who have written software before know that maintaining the code base is as important as writing performant and production ready code.
The obvious question that might have come to your mind after reading the intro would be, how does one manage their code base? The answer today that would be version control systems. Version control or VCS as it’s popularly known as a software system that manages and tracks changes to a particular file or a set of files and allows you to easily go back in time to undo any unnecessary changes that you may have made.
As a beginner, learning to code may already seem quite overwhelming to you and on top of that adding the responsibility of managing yourself code, it certainly sounds like a mammoth task now doesn’t it? Well, you don’t need to worry. In this article, I’ll walk you through a step by step procedure for managing your code base under a version control system and at the same time telling you a bit about why it’s an important skill to learn.
In the developer community, Git is the most popular VCS available, so we will base this article on Git. Along with Git, I would also give you a brief introduction to GitHub which is a version control repository hosting service.
Linus Torvalds, the father of the Linux kernel, while developing the same came across a situation where he could no longer properly manage the code that he was writing at the time he was using BitKeeper. So he took a small detour to develop Git and made it public in the year 2005. The design of Git was closely based on BitKeeper. The name “git” was given by Linus Torvalds when he wrote the very first version. He described the tool as “the stupid content tracker”.
Contents
Why does Every Developer need to Learn How to use VCS?
Traditional software systems comprise of several files, spread across many directories and in a typical company, there are multiple developers writing changes to the software stack at the same time. It becomes highly important for all the developers to stay as productive as possible but at the same time, it’s equally important to keep the entire team on the same page. Meaning each person on the team must know exactly what features are being developed. Another important thing to keep in mind while developing software is the fact that one person’s work should not affect the work of any other person on the same team. In layman’s term, what I mean is if you as a developer are working on one feature, it should not hinder with the workflow of any of your teammates as you write changes to the codebase. All of these cases are handled very elegantly with VCS. It not only makes the lives of developers easier by keeping track of changes issued by each individual on the team, but it also maintains a version history in a simple format so that any accidental changes to the codebase can be easily averted.
There are many version control systems available on the market like Subversion, Mercurial etc but the reason why we are focusing on Git is that it is by far the most popular option available.
Setup
The setup of git is different depending on what operating system you are on. I’ll walk you through the setup process on macOS, Linux, and Windows.
macOS
Installing Git is quite easy on the Mac, first make sure you have installed brew, the popular package manager for the Mac. Once the brew is setup (which honestly takes just a few moments depending on your internet speed) you just need to issue the following command:
- brew install git
Linux
The install process on Linux is also fairly similar to macOS. Open the terminal and issue the following command:
- sudo apt-get install git
Windows
The install process on Windows is a little bit different. On Windows, you need to download an installer. Head over to this link to download the latest installer and then run the installer to install git on your Windows machine.
Getting Started
Now that you have your system setup. You need to initialize a git repository. What is a repository you ask? It’s the folder/directory in which all your project’s files are stored. Here are the steps to initialize a git repository.
- Launch the Terminal/ Command Prompt on your machine.
- Navigate to the project directory which contains all the project files. (This is usually done using the cd command on all platforms)
- now that you are inside your project directory issue the following command: git init
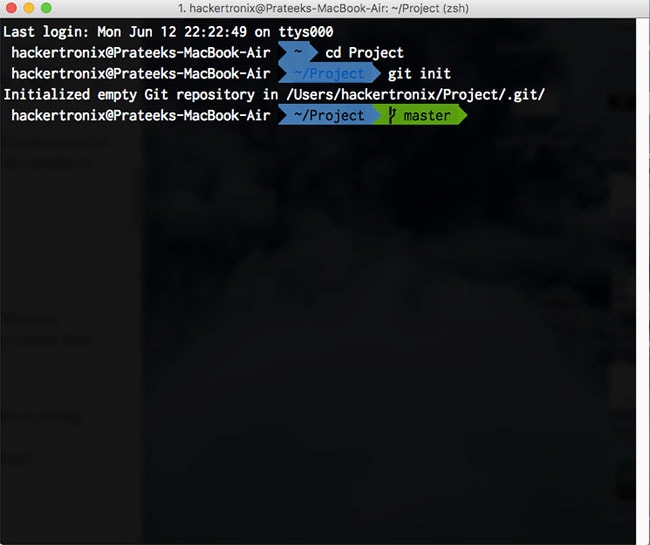
Now that you have initialized your git repository, git knows that it has to track changes across all files in the directory. Git will now know every time you add or remove any files in the project directory or make any changes.
Making Changes and Issuing your First Commit
The most important part about any VCS is tracking changes. Any time that you issue a change in the project directory, it will be reflected in the status of the repository. Go ahead and add a file to the directory or make a change to an existing file. After doing so you can’t issue the following command to check the status of the file in the repository.
- git status
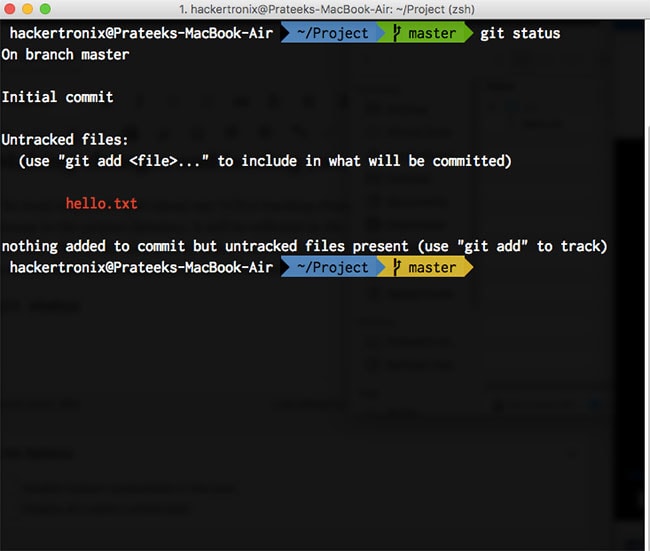
As you can see, git says that there’s an untracked file. Now we need to add the untracked file to git’s staging area. You can think of the staging area as the intermediate stage before a change is finalized. To add the file to the staging area issue the following command:
- git add
On issuing the git add command you can reissue a status command to see the status of the file.
Now, that the file has been added the file to the staging area, it’s time to finalize your change with a commit message. Issue the following command:
- git commit – m “YOUR_MESSAGE”
Replace the part under the quotes with your own custom message. Now, check your repository with a git status. You will notice that the commit was successful.

Branching
Branching is a key topic in the version control system. It is very important to separate your stable (things which are working perfectly fine and have been tested) parts of the project from the parts currently in development. It’s important because you need to make sure that people using your software aren’t affected by changes you make while adding a new feature. This is where branching comes I to picture. It helps segregate your code base into different sandboxes so that your working parts aren’t affected by any change you make to the other parts.
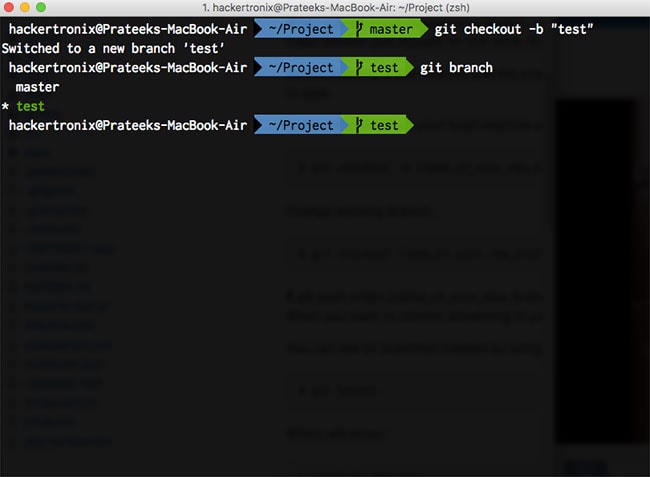
Creating a branch using Git is fairly simple. Just issue the following commander
- git checkout -b “BRANCH_NAME”
After doing so you can check which branch you are on by issuing the following command:
- git branch
Sharing your Code on GitHub
You have successfully learned the fundamentals of version control using git. Now it’s time to make your project public by sharing it with the developer community. This is the first step towards open source software development. Open sourcing your code means marking it’s public so that others can look at it, contribute toward its development and if required adapting it to their own projects.
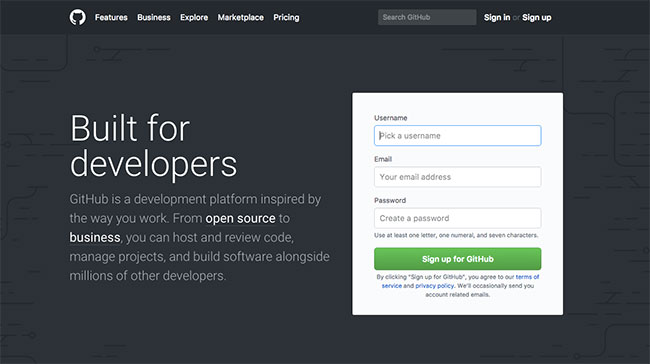
Make sure you have a GitHub account before proceeding.
Once you have signed up. Go ahead and create a repository on GitHub as shown in the screenshot below.
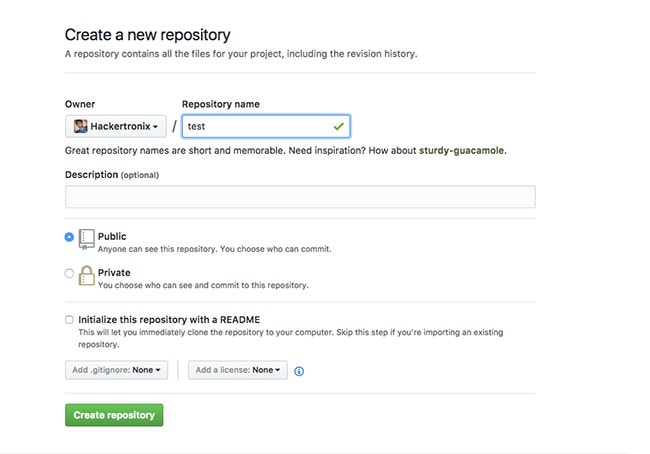
Once you create the repository. You will be shown further steps to guide you into bringing your project on GitHub.
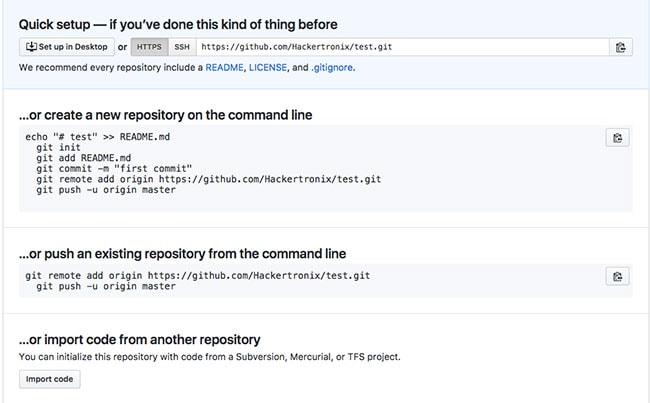
Since you have already created a repository. You just need to push it. Issue the following command to do so.
- git remote add origin REMOTE_URLgit push -u origin master
Once that is done you can visit the remote URL to check out your projects. Others in the community can contribute to your projects by issuing changes.
Conclusion
Congratulations. You are now one step closer to creating the next big thing in tech. And I’m sure that in the course of doing so, you’ll also apply the handy concepts of version control that this article has taught you. Big companies like IBM, Google etc have huge portfolios of services which they constantly keep evolving with cutting edge technologies and features and the only way they are able to manage such a large suite of products each scaling to several million lines of code is through versions control systems. Themselves companies either have theirs in-house solution for VCS or rely on the popular VCS like Git or Subversion. Most of the theory open sources projects are available publicly on GitHub. It’s certainly an important skill to master and know how to manage large codebases will effectively change the way you work and will increase your credibility as well.