In this part of our how to start a blog, we are assuming that you have installed WordPress and know how to write a post. If not then go back to the previous instruction: How to Start a Blog. We will now explain how to change your blog design.
After installation, your blog will be of the standard WordPress design and will look very bland. However, one of the attractive aspects of WordPress is that it enables you to change just about everything, including the way it looks to your visitors. There is an almost unlimited selection of templates or themes you can use, many of them free, and also a wide range of plugins to provide added functionality.
Contents
How to Start a Blog: Setting Your Theme
A theme is a template that provides the ‘look and feel’ of your blog. The complete layout of your blog can be changed by changing the theme. Go to your blog’s Dashboard on the left hand side then click on Appearance ->Themes. You will then see a list of themes that are available to you.
WordPress will usually display its own standard themes here to begin with, and also any you install yourself. The theme currently in use will state ‘Active’ at the bottom of its image on this list.
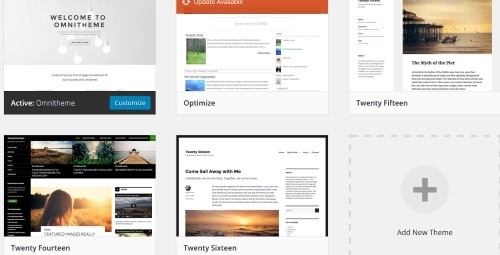
The above image shows a number of themes on this site: Twenty Fourteen to Twenty Sixteen are standard free WordPress themes. You can normally preview your theme first, and activate it by clicking on ‘Activate’ – in some cases you will need to hover your cursor over the theme to see the ‘Activate’ button.
We suggest you start with one of the free WordPress themes to start with until you are acquainted with designing and writing blogs. There are many more paid and free themes available online. They are easily uploaded to your blog.
Adding a New Theme
On the dashboard, go to Appearance->Themes then click on the ‘Add New’ button:

You will now be presented with a list of available themes:
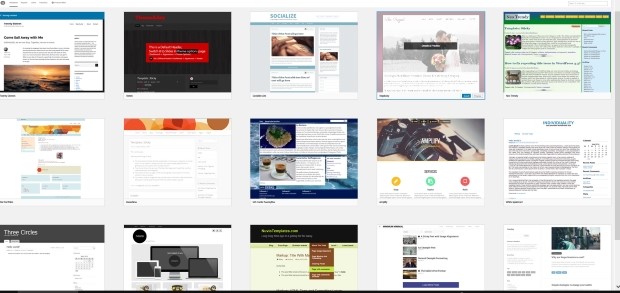
Choose one that suits you then hover over it with your cursor then click ‘Install.’ Once installed, click ‘’Activate’ and your new theme will take the place of the one you have been using. You can start to customize your blog to look the way you want it. You will find thousands of WordPress themes online if you carry out a Google search – most paid, but some free.
Knowing how to set up good navigation system is an important aspect of understanding how to start a blog correctly. Navigation menus enable your readers to navigate around your site by clicking on links. WordPress offers a simple way of creating these, and your theme might also offer menu structures specific to that theme. Here is how can create navigation menus using WordPress.
Go to Dashboard -> Appearance -> Menus:
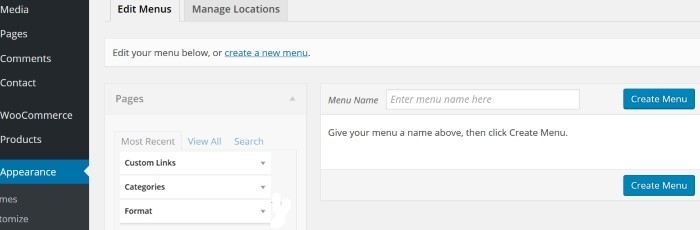
Enter the name you want to give your menu into the ‘Menu Name’ box and click ‘Create Menu’. Next, you have to add the menu items; the pages your menu will lead to when the links are clicked.
To generate a link click on ‘Custom Links’ and then add the URL of your link. Let’s say this is your Home Page, it would be http://mysite.com. You will also be asked for the ‘Link Text’ – how the link will look in your menu. You can name this ‘Home’.
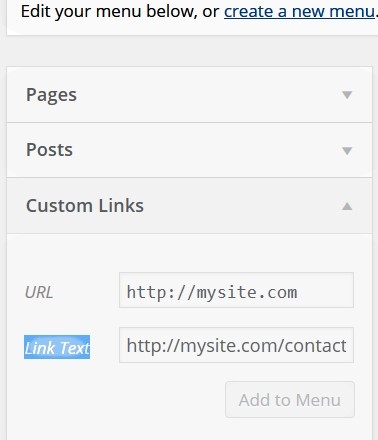
If you already have pages on your blog, you add links to these by clicking on the ‘Pages’ section as above, and choosing the page you want from the list provided. You can also change the Link Text to suit the menu, for example ‘Contact Us’. Having done that, click ‘Add to Menu.
How to Place Your Menu on Your Page
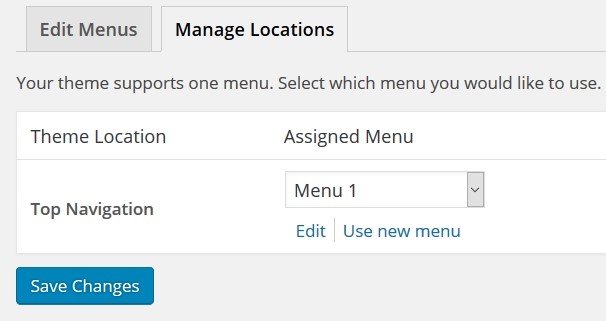
Take another look at the Menu ‘Section’ image above. You will see a ‘Manage Location’ tab beside the ‘Edit Menus’ tab. Open that to place your menu where you want it to be seen on your pages. When you click on the tab you will something like this:
I want to add my menu to the ‘Primary Menu’ area – so use the drop-down menu to the right to select your menu name and then save changes.
To start, click on the “Pages” section of the menu editor.
Your theme may offer you multiple menu locations or just the one. In the example above, your only menu location is at the top of your page or blog post. Many believe this to be the best location since it catches the eye of your readers when they access your blog. Once they have finished reading a post they can scroll up and click to find another page or service that may interest them.
Changing the Visible URLs
In WordPress, the way the web addresses (URLs) are constructed are known as ‘Permalinks’. These are not very user friendly and need to be changed. An example of a standard permalink is http://yoursite.com/?p=127. We won’t go into how this is constructed here since it is irrelevant. What you must do is change it.
To do this, go to Dashboard -> Settings -> Permalinks
You will see a screen like this:
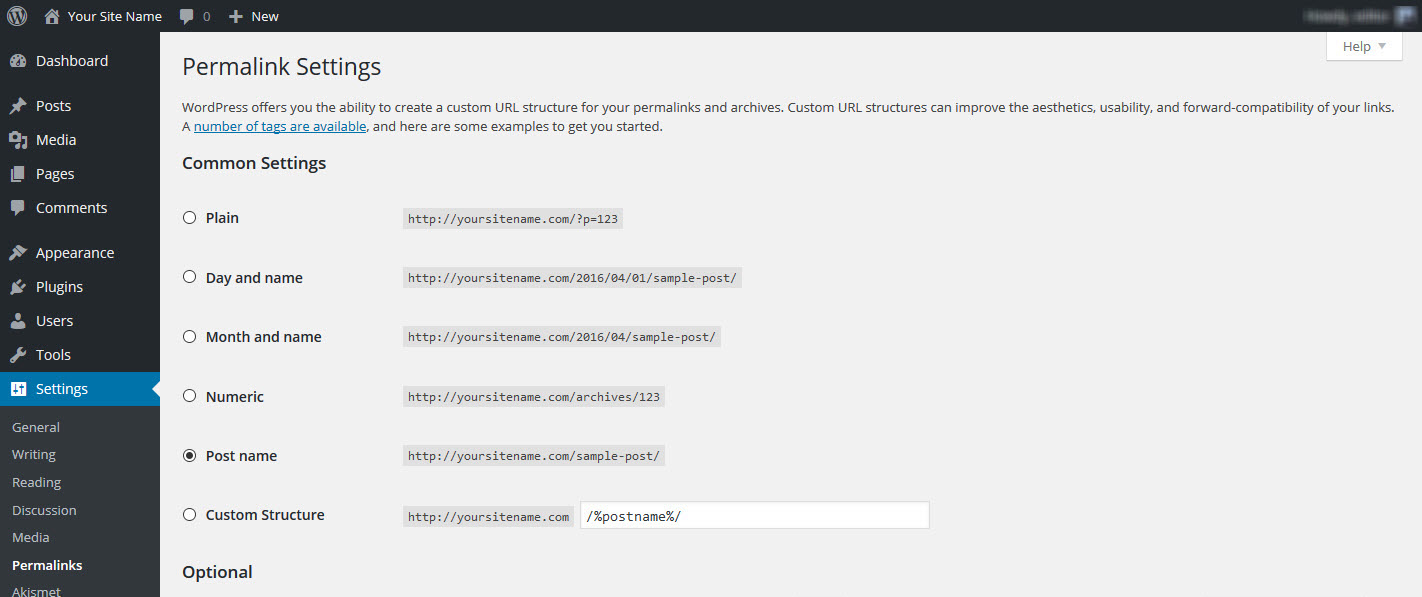
Either click on Post name or, as I prefer to do, click on Custom Structure and copy /%postname%/ into the text box provided. Either should work. What this does is to use the post name you entered into the ‘Permalink’ box at the top of your ‘Add New Post’ screen. Click ‘Save Changes’ and you are done.
Next we will show you how to how to add plugins to open up a whole new world of blogging.
Adding Plugins to a Blog
Plugins are scripts or apps you can add to your blog to expand its functionality, and are an important aspect of understanding how to start a blog your visitors will take to and like. Plugins are developed by third-party programmers and there are literally hundreds of them to choose from, if not thousands. Plugins are available for functions such as:
Getting your SEO right: Search Engine Optimization improves the likelihood of a good search engine ranking. Yoast is about the best in our opinion.
Social Media: Plugins enable you to add a range of social media buttons to your blog. Connecting with social media such as Facebook, Twitter, Instagram, Pinterest, Google+ and others not only increases the exposure of your blog to potential visitors, but also enhances your exposure on search engines.
Contact Forms: Having a contact form on your blog makes it easy for readers to contact you. They do not have to access and write emails, but simply fill in your form and send it off to you with one click.
Jetpack Plugin: There is one plugin that not only gives you lots of stats about your blog, and allows you to images to your sidebar menus, but also makes sure your blog looks good on small cell phone screens and tablets. That is jetpack, one plugin most people should have installed – you can always deactivate it if you don’t need it.
Askimet Plugin: Askimet stops ‘Comment Spam’. This is like eMail spam, but it appears in your ‘Comments’ box on your blogs. Unless you control this, blog spamming software can fill your blog comments with spam before you realize it.
To install any plugin, simply download it and click ‘Install’. Your plugins will appear in your dashboard under ‘Plugins’ and they generally come with instructions on how to use them, and a website for support should you need it.
Here is the plugin installation page. Go to dashboard -> Plugins and you will find this screen:
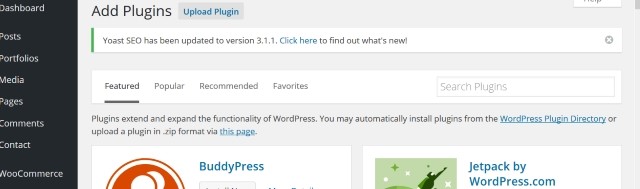
This page will enable you to search for useful plugins – both in the scroll-down list starting with BuddyPress and jetpack above, and by clicking on the menu beginning ‘Featured’ and ‘Popular’. Each plugin explains its use and how to download and activate it. Most also enable you to change settings, should that be relevant to the plugin.
If you choose the right plugins, you can save yourself a great deal of time in setting up your blog. There is even a plugin that attached your Google Analytics account to your blog and one that registers it with your Google Search Console account (formerly Google Webmaster Tools). Spend some time scanning through the available plugins, and you could find something you like or that could save you a great deal of work.
Making Quick Changes to the Design of Your Blog
You now have your blog running as it should, but maybe you want it to look different – maybe with your own colors or your own images in your heading. Here is how to customize the design of your blog to reflect your own preferences.
Go to Dashboard -> Appearance -> Customize. You will see this screen with your Home Page on the right and customization options on the left. Those displayed below might be different to yours, depending on your theme. However, the general principles still apply.
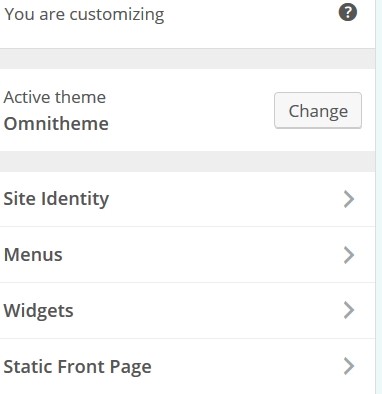
Your own active theme will show in place of our ‘Omnitheme’. You can change the theme from here, but this is not recommended if you are already working with one you like. Here are the changes that can be made here:
Site Identity:
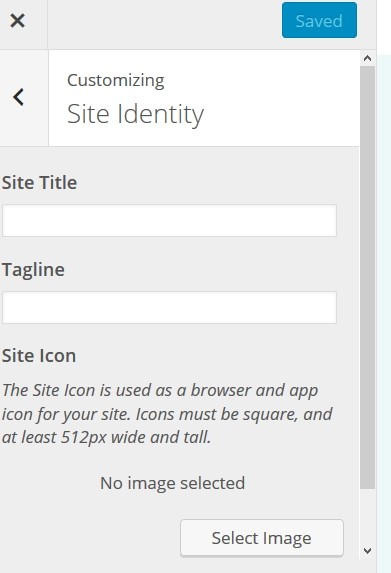
The options given here will change with the theme you choose to use. Here you can change the title of your blog and also the tagline, a sub-title that appears at the top of each page. Many prefer to ignore the tagline, but this feature makes it easy to use one and then clear it if you don’t like the look. Simply come back here and clear the tagline window.
You can also choose an image for the header of your blog – this will appear on every page and post. Some themes will allow you to add a background image to lie underneath your text. In some cases you can change the color of your text, and add a background color to your blog posts.
Don’t worry if all of these options appear with your theme. You can carry out all of the above elsewhere on your blog. Text color can be changed for each page and post from the text editor, and background colors and images should not worry you right now since most people do not use them.
Menus:
The ‘Menus’ link offers you these options:
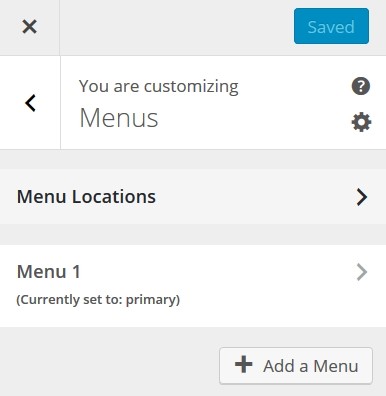
Again, this can be different with your theme, though the same options should be there. You can change the location of your menus and also add new menus.
Once you have been blogging for a while you will become conversant with all the options available with the theme you are using. There are other ways of changing the look and feel of your blog but for now, you have enough information to be going with.
Widgets:
You should learn how to use widgets correctly. Widgets are scripts which provide added functionality and pizzazz to your site. For example, you can add a calendar widget that shows your visitors a calendar for the current month on your site. A ‘Search’ widget adds a search window to your blog, where readers can add keywords to search your site for relevant information. The right sidebar below shows a selection of possible widgets you can use.
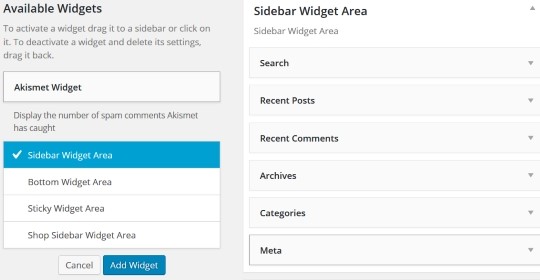
You can click on ‘Available Widgets’ and then activate the widget you want to use. You can also downloads widgets online and use these if your particular theme allows it. You can choose where to place a widget: On a sidebar, at the bottom of a page or even make it sticky, in an area in your post or page that stays visible on the screen irrespective of scrolling.
Static Front Page
This option allows you to identify one of your pages or blog posts as a static Front Page. This will be the page that all your visitors see when they first access your blog. Some bloggers prefer their posts to appear on the landing page of the URL, while others prefer a static page with which visitors can become familiar.
Sometimes certain visitors feel a better sense of identity with a blog if they get to the same front page every time. That Page can. Of course, be designed to have a static introduction section and then display the latest blog posts. So a static page need not be like a regular website landing page – but it will be the landing page for your blog!
That’s all for this part of our Guide on How to Start a Blog. You should now be able to create a blog get started promoting it. The next part of this Guide will explain how to promote your blog.