OVERALL VERDICT
Out of 10
Pros
- Supports Gamification
- Extensive theme customization
- Integrates well with other WordPress plugins
- Makes it easy to build an online community
- Supports various types of plugins
Cons
- There are a few features that lack customization
In this article, I have shared an in-depth BuddyBoss Review for 2024.
If you own a WordPress membership, you will require a WordPress theme. This theme will let you display anything your site needs. Those of you who have created their WordPress-based membership sites must be knowing that creating a membership site is not that easy.
There are a lot of options and a lot of things to decide on, plus you need to research what is the most suitable for your website.
Most of the WordPress themes are not very well suited for a membership site perse.
You will need quite a few features like –
- Management of User Account
- Community Member Features
- Tracking of Course
- Display of Online Courses in an attractive way
Different sorts of plugins are required for the typical features of membership. Also, you will need an attractive theme, that can make your website look good and appealing. For this, the best you can use is BuddyBoss.
Bottom Line: Looking for a platform to build your online empire? Look no further!
BuddyBoss is the world’s leading open-source platform. That means you get all the flexibility, control, and freedom you need to create a successful online platform. Plus, its amazing support team is always here to help you out.
With BuddyBoss, there’s no limit to what you can achieve. They provide everything you need to get started – from templates and themes to plugins and extensions. So why wait? Get started today!
Contents
- What Exactly is BuddyBoss?
- Why is BuddyBoss Best for Membership Sites?
- BuddyBoss and LearnDash
- Getting Started With BuddyBoss
- BuddyBoss Theme Options
- BuddyBoss Pricing: How Much Does BuddyBoss Cost?
- How Good is BuddyBoss Customer Support?
- Pros and Cons
- FAQs | BuddyBoss Review
- Conclusion | BuddyBoss Review 2024
What Exactly is BuddyBoss?
If you are familiar and have worked with WordPress, you must be knowing that there are two open-source and free community add on plugins known as –
- BuddyPress: It is built to turn WordPress into a social network with groups, newsfeeds, member profiles, etc.
- BBPress: At the back of WordPress, it allows you to create forums.
Both of these plugins are designed by the WordPress folks themselves. Both these systems are extremely powerful, but to turn them into something that you want, you will have to make a few custom developments and add-on plugins.
Also, for both the styling is quite minimal. BuddyBoss started as open-source software that people can freely develop and use. Later, they moved in another direction and fixed a few issues, added more functionalities, and created The BuddyBoss Platform.
These tools do offer a lot of features and users have to make a lot of customization. The users also have to pair them up with third-party tools to get what they want for their website.
To take care of the visual side these plugins have limited styling options and also require premium WordPress themes. This makes it not a cost-effective or easy way to set up a website.
Initially, BuddyBoss allowed the users to modify or freely use the platform to customize the website as per their needs. With passing years, there have been a lot of improvements, additional features, bug fixes, etc, and have now made it the famous BuddyBoss platform which we use today.
The BuddyBoss platform is a platform for the community and is very powerful. BuddyBoss is a great option if you are looking for building community features into your websites (maybe a public or a membership site).
If you look at the theme of WordPress, it is pretty ugly. It works great but it does not look good. To make it attractive, appealing, and look professional, you will have to spend some time on the customization.
For this customization, BuddyBoss comes into play. If you are looking to create a website with the BuddyBoss platform, it is free and easy, but it does not look good.
For making it look nice and beautiful you will have to customize your site and themes taking the help of BuddyBoss themes. They also work with the older BuddyPress, so if you are looking to shift your data and social profiles you can do it easily.
For anyone who is looking for customizing his/her website with a professional look and does not want to mess with anything like the CSS, codes can use the BuddyBoss platform.
The BuddyBoss theme is a premium theme that works with the BuddyBoss platform and also supports integration with some tools including LearnDash and GamiPress.
In this article, wherever we refer to BuddyBoss, it means the new BuddyBoss i.e. a combination of both the BuddyBoss platform as well as the BuddyBoss theme.
Why is BuddyBoss Best for Membership Sites?
The BuddyBoss Theme was specially created for membership websites. Most of the themes in it are designed for blogs and their functionalities. Although there is one problem, it does not support a few other things.
The biggest problem here is you have to do a lot of customization. There is something called Thrive Apprentice, that you can use if you are looking for organizing your courses and all.
Although, Apprentice can only help you with the design functionality and bypasses the theme altogether.
A very big advantage of using BigBoss is that it will save you a lot of time. The themes from BigBoss are designed for membership sites, they can integrate with everything one needs and looks good, and gives your website a professional touch.
Here are a few things that you can do with the BuddyBoss Combo –
- Allows the Customization of the Login Screen: To use the default WordPress login and to give your website a professional touch, this would be of great help.
- Ability to Lock: If you want, you can lock down the complete site and will require a login to unlock it.
- Supports Gamification: In case you need it, you can use it. With this, you can also create site-wide or exclusive events, create job posts, etc.
- Can be Integrated With LearnDash: Right out of the box, your LearnDash courses will look great. You can use it for study purposes like creating, hosting or managing courses. It can also help you with LifterLMS.
- It Supports Various types of plugins: You will require different forms and styles in your membership to make your site look great.
- Integrated with WooCommerce: With this, you can turn your website into an online selling platform and will make your system look great.
- Supports Major WordPress Membership Plugins: This will pay special attention to the various screens from plug-ins like Wishlist Member, Restrict Content, Paid Memberships Pro, and Member Press to look great.
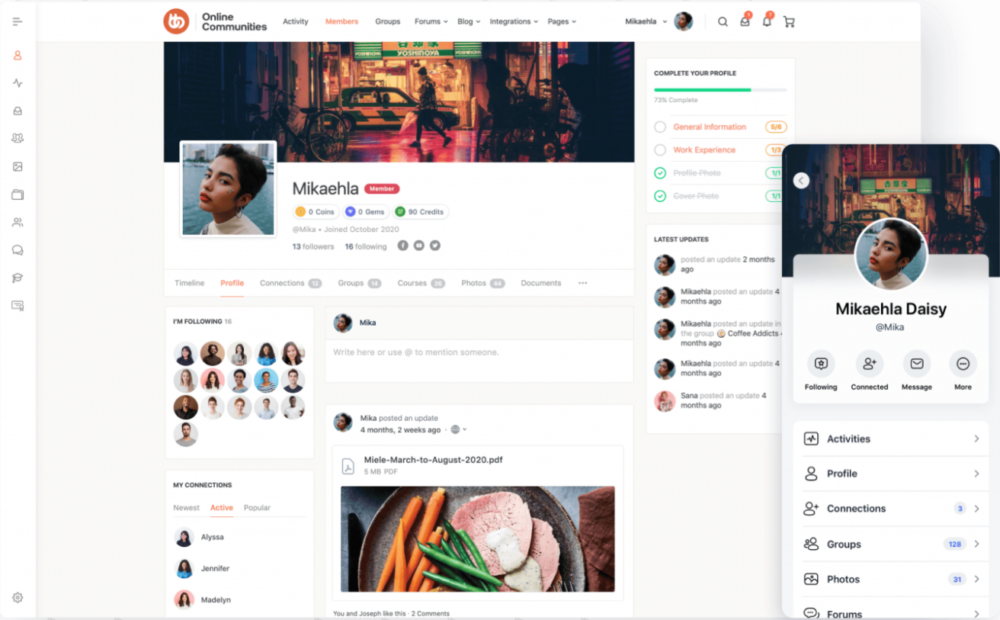
- You can create a Social Network or a Community: With BigBoss Combo, without using any extra plug-ins you can complete with e-mail invitations to non-members, member connect, forums, social groups, private messaging, timelines, news feeds, user profiles, etc.
Here are a few of the core features of the BuddyBoss combo. All these can be achieved because the BuddyBoss combo is a combination of BuddyPress and BBPress.
- Participation in forum discussions
- Can Help You Create Blogs
- Allows You To Follow Activity Stream
- Allows the users to join and form groups
- Allows Sending Private Messages to Other Users
- Users are allowed to Update and Create Profiles
BuddyBoss and LearnDash
Both LearnDash and BuddyBoss can be integrated. BuddyBoss has taken extra care to make their themes suitable for working with LearnDash, this makes it even better for the two to work together and use it to sell content and build a community.
LearnDash is a WordPress Plugin that is a learning management system that lets you manage online courses, create, host, etc in one place. This plugin is premium, and you will have to purchase it separately.
If you integrate this plugin with WooCommerce, you can also sell your online courses, based on subscriptions or for a one-time fee.
You can use LearnDash, to create your courses from the very beginning. It has powerful tools that can help you build a course, create assignments, and quizzes, make custom certificates, and many more. There are a lot of possibilities for you with LearnDash.
Integrating LearnDash with BuddyBoss
Step – 1: Go to Plugins > Add New.
Step – 2: Install and then activate LearnDash from there.
Step – 3: Go to Learn Dash >Settings
Step – 4: Keep the active template to ‘LearnDash 3.0’.
Here are some of the best features of LearnDash –
- All prerequisites are flexible and very easy to use.
- Content delivery is dynamic.
- The quizzing level is advanced, safe, and secure.
- One can build a course with simple drag-and-drop, which makes it very easy.
- Focus Mode will help students not get distracted while taking your course by removing any sidebars etc.
Getting Started With BuddyBoss
Setting Up the BuddyBoss Platform
There are a lot of things you will have to take care of while setting up on the BuddyBoss platform, since it has a lot of options it will take a lot of time, and may need you to do some changes even after setting up, but it is worth it.
Just follow the instructions very simply described in this article for your ease for perfect results. There are a lot of complexities and hence you may get confused, so avoid getting lost by following these instructions.
Here are just a few essential things you need to know –
- Selecting Components: You first need to add or delete components, which your social networking site needs. So, here are the steps you should follow –
Step – 1: From the home page, on the left side you will see a dark grey colored box. There, select ‘BuddyBoss’, and then select ‘Components’.
Step – 2: Now you will see a lot of options coming up. Select or tick the ones which you would like to add to your website.
Step – 3: Above these options, you will see ‘Bulk Options’, select it, click on ‘Activate’, and then on ‘Apply’.
- Setting Up Registration Pages and Components: The component pages are automatically created by WordPress so you would not need to worry about it. However, if you want to assign a new page to any social group, you can follow the following steps –
Step – 1: Go home, in the grey box on the left side you will see an option called ‘Pages’. Click on it and then click on ‘Add New’.
Step – 2: A new tab will open where you have to type the name of the page in the box. Type it out and click on ‘Publish’ in the upper right corner of the page. Then click ‘Refresh’ and you will be diverted to the components page.
Step -3: There click on ‘Social Groups’ and add yours to it. After that, at the bottom of the page click on ‘Save Settings’.
Now for the registration pages, you will have to create a page for ‘Privacy Policy’, and ‘Terms of Service’, and then link them with the corresponding registration sections. On the same page as that of the components, you will find an option called ‘View Tutorial’, which is very helpful for beginners for working with registration pages.
- Settings Configuration: Now you will have to go through a lot of settings carefully as per your needs. Follow the following instructions –
Step – 1: On the left side grey box, click on ‘BuddyBoss’, and then on ‘Settings’.
Step – 2: Tick the options carefully, what you need and whatnot for your website. If required, watch a tutorial from the option ‘View Tutorial’.
Step -3: As soon as you are done, with both general as well as privacy settings, click on ‘Save Changes’.
- Importing of Demo Data:
Step – 1: Click on ‘BuddyBoss’, then on ‘Tools’, and then on ‘Default Data’.
Step – 2: You will see a few options on the screen. Click on the ones you need (it is suggested to click all but it depends on your requirements).
Step – 3: After ticking, click on ‘Import Selected Data’.
- Community Components (Online):
Now you are ready to create your online community. It can help you in creating advanced communities online like Twitter or Facebook.
It is very easy to create any website using BuddyBoss as it does not require any extra plug-ins and has detailed videos on everything which can help you know and understand the procedure and work. It is kind of very great for beginners.
Here are some of the components that you can use for your website –
- Invites via Emails: To send email invites, all you need to know is their name and email id. You can send it to anyone with these details. Here are the steps –
Step – 1: From your home page, click on ‘Members’, and then on ‘Email Invites’.
Step – 2: Fill out the details, name, and email, and customize your email.
Step -3: After filling out the details, click on ‘Send Invites’.
In case you want to change members or customize the email again, go to BuddyBoss > Settings > Invite.
Network Search: This is all for searches. You can make available your searches for posts, members, email addresses, discussions, replies, numbers, paragraph texts, usernames, etc. For this, click on BuddyBoss > Settings > Search.
Member Connections: You can send friend or connection requests to other users as well. It is similar to that on Facebook. For this click on BuddyBoss > Components > Member Connections.
Forum Discussions: These are a very integral part of any social networking website. Here, on BuddyBoss, it is similar to that on Reddit in a Q&A format.
For this click on BuddyBoss > Components, and activate the Forum Discussions. In case, you want to edit some settings of forum discussions, you can do it from BuddyBoss > Components > Forum discussions.
Or to customize forum discussions you can use Theme Options > Forums.
Social Groups: This also helps you create social groups based on the interests of the user. For this, click on BuddyBoss > Components and click on ‘Social Groups’, to activate it.
For its settings click BuddyBoss > Settings > Groups. For editing, deleting, or viewing social groups click BuddyBoss >Groups.
Private Messaging: You can message others privately, send photos, GIFs, etc too. Click on BuddyBoss >Components and you can activate Private Messaging there. To change the settings related to media you can go to BuddyBoss > Settings > Media.
User Profiles: It helps you customize your profile in the way you want it. Just click on BuddyBoss > Profiles. Here you can find your details which you can fill up or change.
If you want to rearrange the elements in any user profile, you will have to select ‘Profile Navigation’, which will open in another tab.
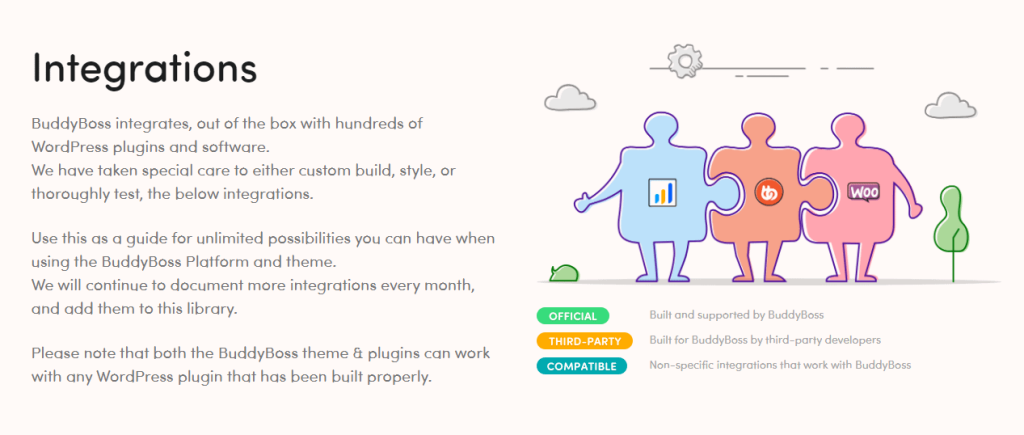
- Integrate With More WordPress Plug-ins:
BuddyBoss, is also compatible, with most of the WordPress Plug-ins, all well-coded, giving you a huge range of possibilities.
- Gamifying Experience for the User: You can add redeemable points and awards for forum discussions and other stuff to increase the engagements of your online network. For this, you can integrate BuddyBoss with GamiPress. It is a WordPress plug-in that Is free that helps you to award points to special or highly engaging users and motivate them for different achievements.
- Making a Mobile App: For your social networking website, you can create a mobile app. You can save everything you have done after working and use that another day. This will also allow you to send push notifications.
- Posting Jobs Sections: You can install the WP Job Manager, on the left side of the panel on WordPress, you will find ‘Job Listings’. Here you can configure the settings of your plugins.
BuddyBoss Theme Options
For customization, most people have to use CSS skills while BuddyBoss, allows you to directly choose or customize your theme without the involvement of CSS. Here is the list of things you can control with the BuddyBoss theme –
- Minification of Javascript or CSS for site performance enhancement.
- Custom Tracking codes, javascript, and CSS.
- Layout of Blog
- Fonts
- Navigation between sections of your site with the BuddyPanel
- Header Buttons, Layout, etc
- Site and Logo icon.
Two main menus that you can create from BuddyBoss menus are – the BuddyBoss menu and the Title Bar menu.
Title Bar Menu:
It is the menu for your header. You can customize both the header and footer. You can also do things like changing the header layout, uploading the logo, changing its color, etc. To create it follow the following steps
Step – 1: Click on WordPress Backend (The Grey box to the left) > Appearance > Menu.
Step – 2: Type out the menu name.
Step – 3: Click on ‘Create Menu’.
Step – 4: You will now see a list of pages you can add to the menu. Select the ones you want to add.
Step – 5: After selecting the ones, click on ‘Add Menu’.
Step – 6: On the menu settings at the bottom of the page, click on ‘Title Bar’.
To customize your header, click on BuddyBoss > Theme Options.
BuddyPanel Menu:
It is a great feature that adds to social network marketing.
To make a BuddyPane; Menu, follow the following steps –
Step – 1: Go to WordPress Dashboard > Appearance > Menu.
Step – 2: Here, you can create a new menu and give it a title.
Step – 3: Now, tick the boxes for the things you want in the BuddyPanel Menu.
Step – 4: As soon as you are done, click on ‘Add to Menu’.
Setting Up Your Blog and Home Pages
Step – 1: Click on WordPress Dashboard > Settings > Reading.
Step – 2: Select ‘A Static Page’ as your home page and anything you want as your blog page.
Now, you can do a few things with your front page, for that
Step – 3: Got to WordPress Dashboard > Pages.
Step – 4: Select the ones you want on your front page.
Now, we will select templates –
Step – 5: On the right side, click on ‘Page Attributes’. Select the template whichever you want out of the three.
Now, if you are looking forward to adding a widget here Is how –
Step -6: Go to WordPress Dashboard > Appearance > Widgets
Step – 7: Now, you simply have to drag and drop the widgets and give them names.
Here is how you can add sidebars –
Step – 8: Depending on which side you want your sidebar goes to ‘Activity – Directory Right’, or ‘Activity – Directory Left’.
Now, to change the layout of your blog –
Step – 9: BuddyBoss > Theme Options > Blog.
Step – 10: There you will see 3 options, Grid, Masonry, and List, choose the one appropriate for you as per your convenience.
You can look at the blog section under ‘Theme Options’.
Theme Options
There are a lot of customization options in there. First, go to BuddyBoss > Theme Options. It is unnecessary to go through all of them, as there are tutorials available that you can use but here are some important ones –
Header: You get three layouts for your header here, on the Buddyboss panel, on the left side, or in the center. There is also something called the ‘Sticky Header’, that sticks to the top. You can disable/enable shadow, and header height, and change a few buttons from the right corner of the header.
Logo: You won’t get options to design your logo here but you can disable/enable logos for mobiles and desktops. This is because sometimes the logo looks too big on the mobile.
Sidebars: You can adjust the position of your sidebar at your convenience.
BuddyPanel: This option will only be available to you if you have created a menu by going to Appearance > Menu. If you have, you can choose whether to put it on the left or the right side.
Styling: This one is very important for branding. To give a professional look to your website you will have to choose the colors wisely. You can choose a color scheme for your BuddyPanel, Header, Body elements, and footer. There are a lot more options to style your website here and it is fun.
Typography: It uses Google Fonts typography customizer by default. You can choose typography, and change the font’s style, weight, size, and subsets.
Blog: Apart from the 3 mentioned earlier, there are a lot more ways in which you can customize your blog page.
You can change how your featured image is displayed, disable/enable related posts, limit related posts, enable/disable the blog author box, and add a newsletter shortcode. You can enable floatable social links.
Although there are a lot more things in this regard you can’t do here, this is pretty good for beginners.
Register/Login Page: You can style it to look like a professional and not the usual one. You can choose a background image. There are a few more options you will like to explore.
Here are some of the other few options that you can use in Theme Options –
- Customization of your forums like using a banner image, changing the layout, adding forum description or title, etc.
- Set default cover images for user profiles
- Maintenance mode can be enabled.
- Minify Javascript and CSS.
- Adding custom codes.
- Customizing the 404 pages.
Customize your footer by changing colors, adding widgets, adding social links, changing the label, adding a shortcode like newsletter signup, and many more.
Customizing BuddyBoss + LearnDash
Customization of the Course List Page
When you will go to BuddyBoss > Theme options, you will see LearnDash, as a completely new section. Here you can customize it your way. Enabling ‘Categories Filter’, will allow your members to see all the courses under one category. ‘Taxonomy’, will allow your members to filter by category or tags. You can also use ‘Instructors’ if there is more than one instructor in your course.
You can choose, whether to display the date of creation on the course, course author, date of creation of topics, lessons, etc. You will see progress bars here too.
Customization of the Course Page
From here, you can add short descriptions, titles, featured & covered images, and many more. For this go to LearnDash > Courses. Click on whatever courses you want to customize.
By doing this, you will reach the Gutenberg editor, where you can give title descriptions, deal with images, etc. Instead of a Featured Image, you can also use a video.
There is an exciting feature called the ‘Focus Mode’ that will remove all distractions for the students like sidebars, menus, etc. There is a much more cool option in there, but you will have to dig deep into it.
BuddyBoss Pricing: How Much Does BuddyBoss Cost?
There are 4 pricing plans on BuddyBoss for your ease. Here are they –
Plan 1 and 2: Essential and Pro:
Pricing for Essential – $228 (Billed Annually) and Pricing for Pro – $288 (Billed Annually) and
The main features of Essential and Pro plans are –
- You get updates for a complete year.
- You get priority support for a complete year
- You get completely featured plugins and themes
The only difference between the plan essential and pro is that in essence, you will get a license for one site while for the pro you will get the license for 5 sites. The essential plan is suitable for the ones working alone while the Pro one is suited for agency business.

Plan 3: Done For you:
Pricing starts at $ 3,000 for a one-time setup and charges $ 19 monthly (Billed Annually).
The main features of the Done For You plan are –
- Custom Feature development is available.
- New Site Setup, design, and implementation
- Existing site migration or setup.
This is suitable for those looking for them to handle or maintain your business.
Plan 4: VIP:
Pricing starts at $ 8,000 for a one-time setup and charges $ 249 monthly (billed annually).
The main features of the VIP plan are –
- Mobile App design, setup, implementation, and branding.
- Your App will be published on your own Apple App store.
- Google Play Store Accounts.
This is suitable for those looking to leave everything on them to grow their business.
How Good is BuddyBoss Customer Support?
Since it is a commercial platform, they have customer support too. At present they do not offer support through mediums such as emails, social media, etc. For using their customer support, you will have to submit a ticket to your help desk.
This is the main reason why many people do not like their support as today most other websites and apps have very quick methods, like live chats that help them support.
Although they may not be able to provide support as quickly as live support, they do reply quickly. Also, they know how to work and solve your concerns and are pretty friendly.
So, yes the support is good but needs a little improvement.
Pros and Cons
Quick Links
FAQs | BuddyBoss Review
What is BuddyBoss?
BuddyBoss is a platform that allows its members to organize themselves into hidden or private social areas or public areas with separate member listing and activity fees. It is a tool of WordPress that can be used for the customization of websites and many more.
What is BuddyBoss Theme?
BuddyBoss Theme is specifically designed by BuddyBoss platform makers to make the BuddyBoss platform look attractive, appealing, and professional. This also helps you customize your website in the way you want it.
How do I install the BuddyBoss platform?
Step – 1: Download BuddyBoss platform from the given link - BuddyBoss Official Download Link Step – 2: Log in to your WordPress website and open the admin dashboard. Step - 3: Click on Plugins > Add on Step – 4: Click on Upload, and attach the zip file with the name ‘buddy boss-platform.zip’. Step – 5: As soon as it finishes uploading, click on Activate.
Is BuddyPress free?
Yes, BuddyPress is free software. You can plug it into WordPress and create a social networking website.
What is BuddyPress used for?
BuddyPress is touted as a “social network in a box” and it helps you build any type of community website using WordPress, with member profiles, activity streams, user groups, messaging, and more.
How do I edit my profile on BuddyPress?
Once you have BuddyPress active you can edit your profile fields under WordPress Dashboard > Users > Profile Fields.
Conclusion | BuddyBoss Review 2024
Buddyboss platform can be for making your website and customizing it in the way you want it. There are a few themes available for you to make.
You can create your website or use several other plugins designed by WordPress itself like LeanDash etc that can help you more. Looking at the features it provides, BuddyBoss is not at all costly.
BuddyBoss is a little complicated to work on since there are a lot of specifics to customize although they have a lot of tutorials that can help you understand how the platform works and you can always take help from this article.